February 18, 2014 boostrap jquery contact form mandrillapi API tutorial form html5
 Don’t get me wrong, I don’t hate PHP but it’s always nice to have new libraries or frameworks that make life that bit easier. Before, I used PHP and jQuery to write contact forms on websites where PHP would handle the sending and jQuery with the interaction, validation and AJAX functions obviously.
Recently, I stumbled upon an article on Medium that teaches you how to get started with Mandrillapp.com which lets you send emails using their API. The beauty of it? You don’t need PHP anymore. Use can just use jQuery only. The article I mentioned, however, only introduces you to the jQuery function required to use the API. I will take it one-step further and build a simple contact form using Bootstrap and jQuery.
Let’s get started.
First off, head on over to Mandrillapp and sign up for a free account. The free account lets you send 12K emails a month which should be enough for most sites.
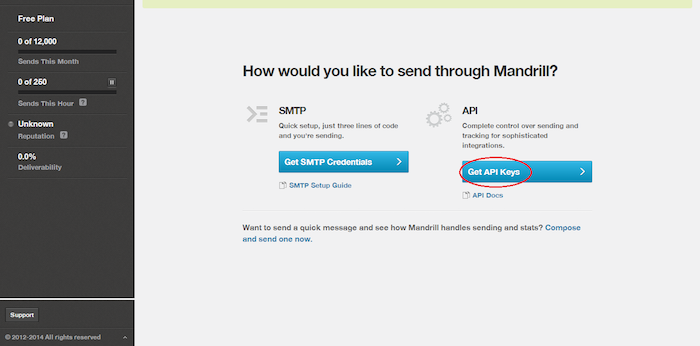
Once you have signed up, you will be presented wit the screen like below. Go ahead and click on the ‘Get API Keys’ button.
 .
.
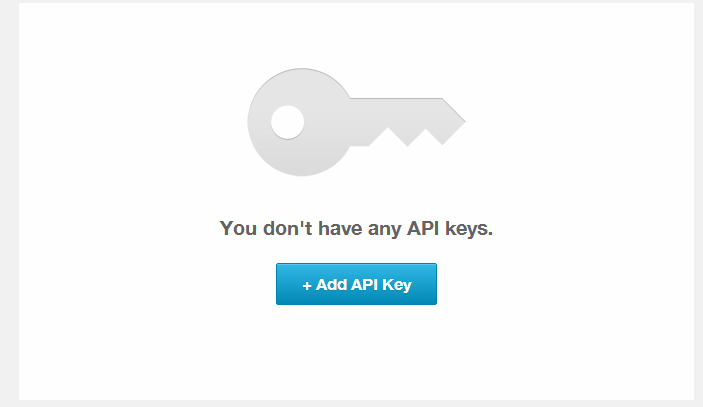
Next, click on the ‘Add API Key’ and a new key will be generated for you. Copy and paste into a document for now. We will come back to it later.
Next, download Bootstrap - if you want to test this out, then I recommend just downloading the forms CSS. In a blank HTML5 document, build a simple contact form.
<form class="form-horizontal" id="contact_form">
<fieldset>

<!-- Form Name -->
<legend>Contact Us</legend>

<!-- Text input-->
<div class="form-group">
  <label class="col-md-4 control-label" for="name">Name</label>
  <div class="col-md-5">
  <input id="name" name="name" type="text" placeholder="Enter your full name here" class="form-control input-md" required="">

  </div>
</div>

<!-- Text input-->
<div class="form-group">
  <label class="col-md-4 control-label" for="email">Email</label>
  <div class="col-md-5">
  <input id="email" name="email" type="text" placeholder="Enter your email address here" class="form-control input-md" required="">

  </div>
</div>

<!-- Textarea -->
<div class="form-group">
  <label class="col-md-4 control-label" for="msg">Message</label>
  <div class="col-md-4">
    <textarea class="form-control" id="msg" name="msg" cols="6" rows="6">You message here</textarea>
  </div>
</div>

<!-- Button -->
<div class="form-group">
  <label class="col-md-4 control-label" for="submit"></label>
  <div class="col-md-4">
    <button id="submit" name="submit" class="btn btn-primary">Send Message</button>
  </div>
</div>

</fieldset>
</form>
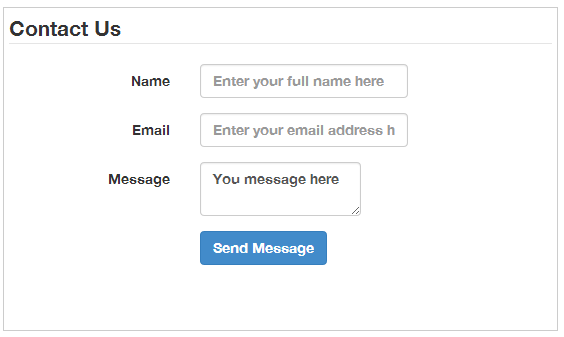
This is what the form looks like.
Now for the fun part. Include jQuery in the header of your HTML file
<script type="text/javascript" src="http://code.jquery.com/jquery-1.10.2.min.js"></script>
Create a new .js file and include that in the header, after jQuery, as well. I named mine contact.js.
<script type="text/javascript" src="contact.js"></script>
In the contact.js file, paste in the code below. The code is commented to explain the functions of the code.
jQuery(function($)
{
    $("#contact_form").submit(function()
    {
        var email = $("#email").val(); // get email field value
        var name = $("#name").val(); // get name field value
        var msg = $("#msg").val(); // get message field value
        $.ajax(
        {
            type: "POST",
            url: "https://mandrillapp.com/api/1.0/messages/send.json",
            data: {
                'key': 'YOUR_API_KEY',
                'message': {
                    'from_email': email,
                    'from_name': name,
                    'headers': {
                        'Reply-To': email
                    },
                    'subject': 'Website Contact Form Submission',
                    'text': msg,
                    'to': [
                    {
                        'email': 'YOUR EMAIL ADDRESS',
                        'name': 'YOUR NAME',
                        'type': 'to'
                    }]
                }
            }
        })
        .done(function(response) {
            alert('Your message has been sent. Thank you!'); // show success message
            $("#name").val(''); // reset field after successful submission
            $("#email").val(''); // reset field after successful submission
            $("#msg").val(''); // reset field after successful submission
        })
        .fail(function(response) {
            alert('Error sending message.');
        });
        return false; // prevent page refresh
    });
});
You can read more about the data parameters you can send over the Mandrill’s API documentation.
You can customise the form even further by adding validation checks and making it prettier. And Mandrill also supports other languages - cURL, PHP, Node - just to name a few.
I made a pen over at Codepen.io. Go and play around with it.
UPDATE: Mandrill, on April 2015 stopped offering free accounts and was fully integrated into MailChimp (its parent application). I would suggest moving onto other services like SendGrid.